Hello, World!

Welcome to my site. It is currently running an instance of Ghost CMS hosted on Vultr. Here, I will document my personal projects – including the development of this very site. Let's kick things off by exploring how I built this blog.
Why a Blog?
The primary reason for creating this blog is to document my personal projects in a credible and accessible way. These posts exist for my own personal reference and as a technical portfolio for others.
My goals are to:
- Capture and consolidate what I learn
- Share that knowledge with others
- Build a credible portfolio
- Practice technical communication skills
Infrastructure Decisions
Ghost CMS
I chose Ghost because it is faster and more streamlined compared to something like WordPress. There is nothing inherently wrong with WordPress, but Ghost lends itself to blog writing and content delivery. It is also boasts a more modern stack based on NodeJS and is less bloated.
Vultr VPS
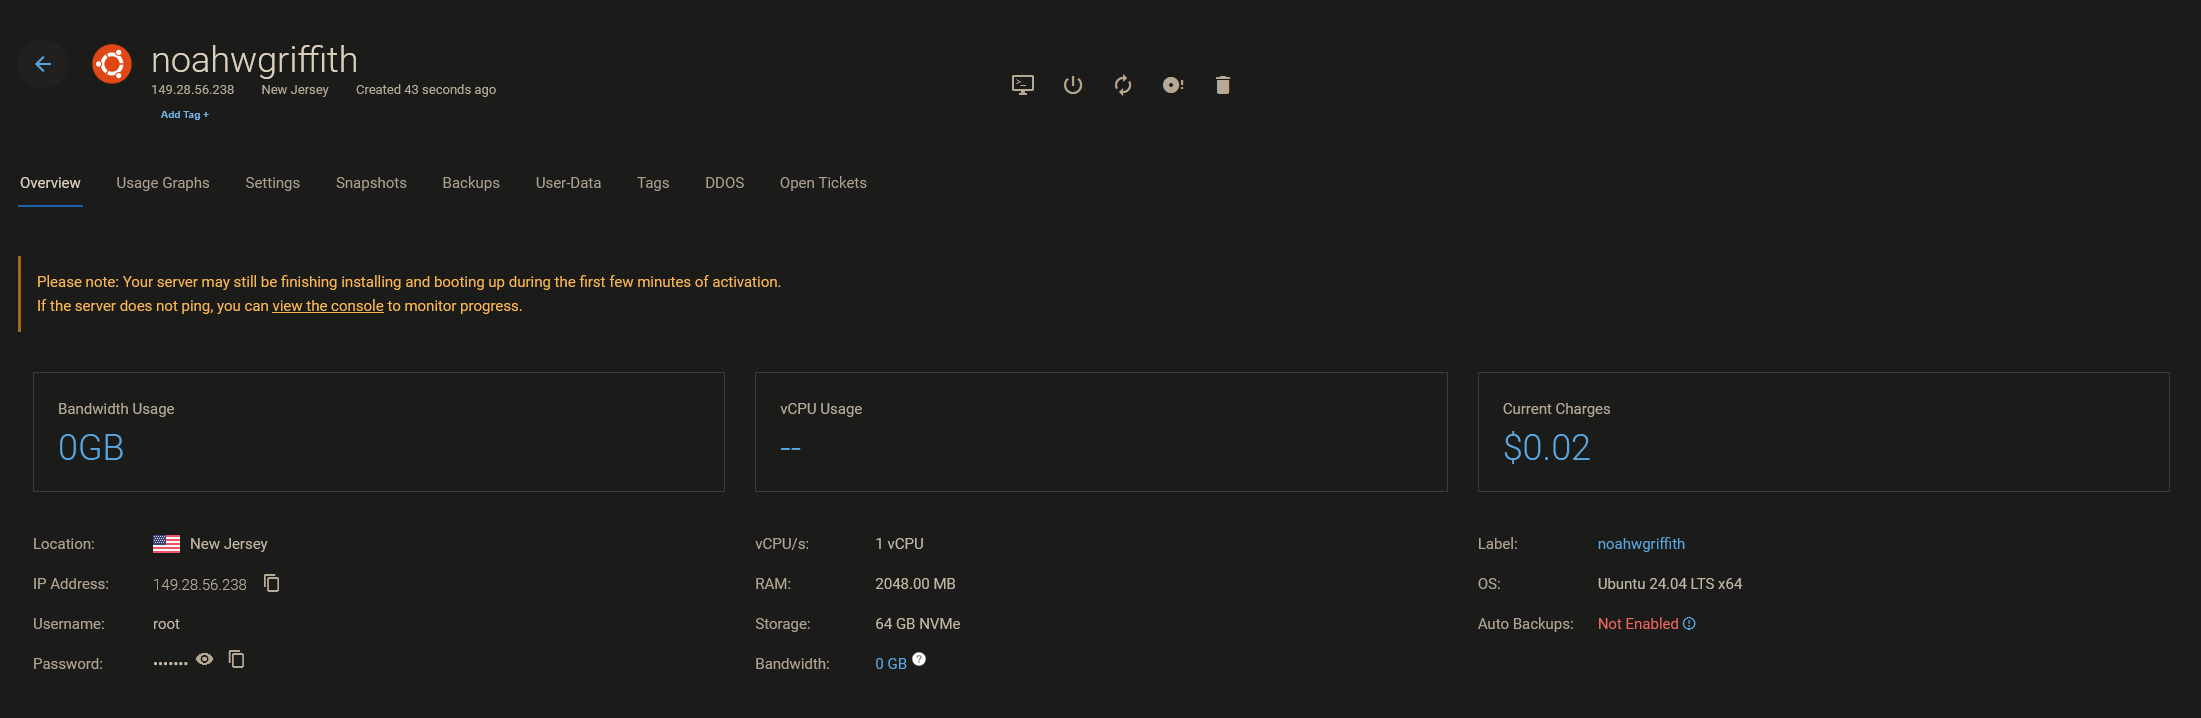
I chose a Vultr VPS because I am familiar with the technology and I have further plans to utilize the VPS as a reverse proxy for my home lab services. Their cloud computing options are relatively inexpensive and easy to deploy.
This very server is running Ubuntu 24.04, with 1 vCPU and 2 GB of RAM – more than enough for our needs.
Domain
The first step in a project like this is obtaining a domain name if you don't already have one. Namecheap is – as the name suggests – a very affordable registrar. While I have used Namecheap in the past, I want to caution others: Namecheap has a clunky interface and setting DNS records is less intuitive compared to others.
If you are looking for alternatives, I have heard good things about Google Domains, Cloudflare, and Epik.
Ultimately, all registrars will accomplish the same thing and setting the records is more or less the same process.
VPS
For this project, I opted to host on a VPS rather than self-host (that is, run it on my at-home server using my own infrastructure). This is for a handful of reasons, but primarily this was a future-oriented decision: I want this VPS to act as a reverse proxy for my other home lab services.
More about this in upcoming projects.
Any provider will do, but Vultr is cheap and I am familiar with the platform. Running an instance of Ghost does not require much, so I am paying ~$12 monthly for 64 GB of storage, 2 GB of RAM, and 1 core. This is still cheaper than paying for managed hosting provided by Ghost, especially considering the bandwidth and functionality at my disposal.
DNS Records
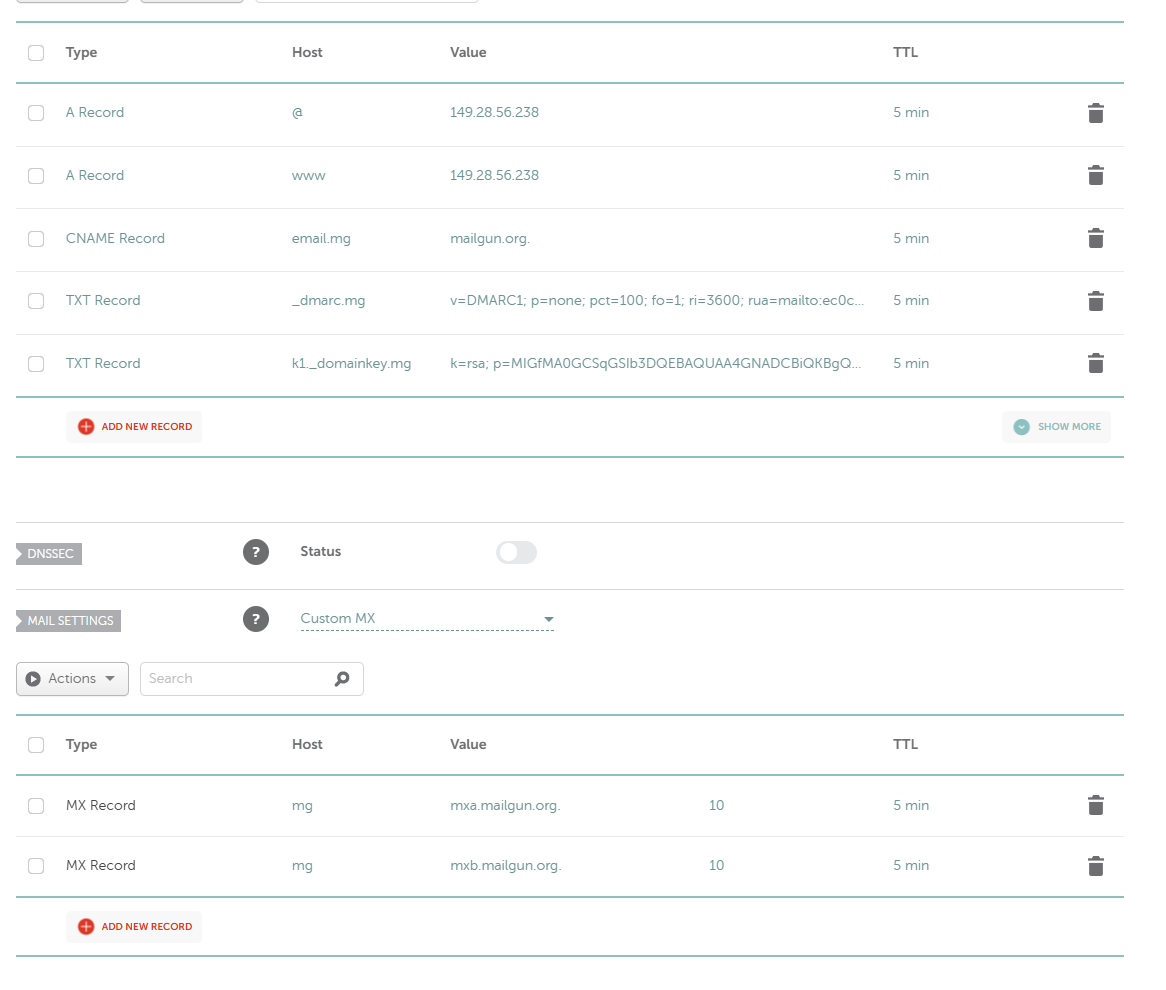
I won't go into too much detail regarding the DNS records. Most of these are necessary to set up Mailgun with Ghost's mailing list functionality – which is worthy of a post of its own. If you were to set up a static site without mailing functionality, you would only really need the A record at the top along with the CNAME record for the www subdomain.
If you're curious about DNS records, you can read up on them here for more information.
The 10,000-foot view is this: DNS – or Domain Name System – is what translates human-readable domain names, like www.noahgriffith.com to public-facing IP addresses. When you paste that domain name into your address bar, your computer sends a request to a DNS resolver (usually provided by your ISP or Google) to obtain the corresponding IP address.
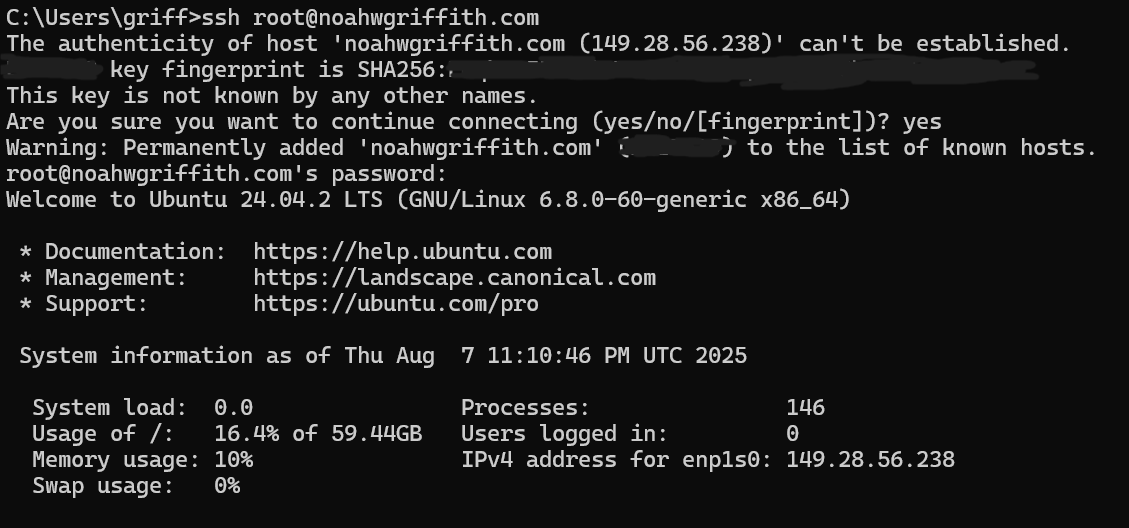
Initial Access
Now we can attempt accessing our VPS. We can SSH in as the root user with the default credentials provided by Vultr.
Updates & Maintenance
We can go ahead and run our usual updates now that we're logged in.
apt update && apt upgradeNext, we should add a new user. We don't really want to be logging in as root constantly. We will be giving this user elevated privileges.
adduser noah
usermod -aG sudo noah
Disable Password Authentication
In order to disable password authentication, we want to generate a new key pair and modify /etc/ssh/sshd_config to disallow password authentication.
First, let's generate a new key pair on our local machine.
ssh-keygen -t ed25519 -C "EMAIL@DOMAIN.COM"On Windows this was stored under C:\Users\USERNAME\.ssh\id_ed25519.pub
Then we want to add this public key to our authorized_keys file on the server.
Modify (create if necessary) the ~/.ssh/authorized_keys file.
Add the public key as a line in that file.
Then we can restart SSH.
sudo systemctl restart sshNow when we SSH in as our user we no longer have to provide a password.
To fully disable password authentication, open the SSH configuration file /etc/ssh/sshd_config.d/50-cloud-init.conf on my system.
We'll change this section:
# To disable tunneled clear text passwords, change to no here!
#PasswordAuthentication yes
#PermitEmptyPasswords no
To this:
# To disable tunneled clear text passwords, change to no here!
PasswordAuthentication no
PermitEmptyPasswords no
As well as disable the root user by changing:
PermitRootLogin yesTo this:
PermitRootLogin noAnd verify that we can still SSH into the server.
Ghost Dependencies
Ghost has a few dependencies we need.
Nginx
sudo apt install nginx
We also should allow Nginx through the firewall (this mostly applies to Ubuntu)
sudo ufw allow 'Nginx Full'
MySQL
sudo apt install mysql-server
Ghost requires some configuration to use MySQL on newer versions of Ubuntu
According to their documentation:
On newer versions of Ubuntu, the root user created when you install MySQL will by default be configured to use socket-based authentication, meaning that only the root Unix user will be able to authenticate. Ghost does not support this kind of authentication, so you must change the root MySQL user to have a password.
# Enter mysql
sudo mysql
# Update permissions
ALTER USER 'root'@'localhost' IDENTIFIED WITH 'mysql_native_password' BY '<your-new-root-password>';
# Reread permissions
FLUSH PRIVILEGES;
# exit mysql
exit
NodeJS
Again, Ghost is picky about which NodeJS version you're running. It only supports 22.x.
Ubuntu is not a rolling release distribution like Arch, so we don't exactly have up-to-date versions of software.
This is how the documentation suggests we get around this.
# Download and import the Nodesource GPG key
sudo apt-get update
sudo apt-get install -y ca-certificates curl gnupg
sudo mkdir -p /etc/apt/keyrings
curl -fsSL https://deb.nodesource.com/gpgkey/nodesource-repo.gpg.key | sudo gpg --dearmor -o /etc/apt/keyrings/nodesource.gpg

# Create deb repository
NODE_MAJOR=22 # Use a supported version
echo "deb [signed-by=/etc/apt/keyrings/nodesource.gpg] https://deb.nodesource.com/node_$NODE_MAJOR.x nodistro main" | sudo tee /etc/apt/sources.list.d/nodesource.list

# Run update and install
sudo apt-get update
sudo apt-get install nodejs -y
Ghost
Now we can actually install the Ghost CLI via NPM.
sudo npm install ghost-cli@latest -gCreate the Website
Prepare the Directory
First we need a directory for Ghost to generate itself in.
# Create directory: Change `sitename` to whatever you like
sudo mkdir -p /var/www/sitename

# Set directory owner: Replace <user> with the name of your user
sudo chown <user>:<user> /var/www/sitename

# Set the correct permissions
sudo chmod 775 /var/www/sitename

# Then navigate into it
cd /var/www/sitename
Ghost
Finally, we can run Ghost.
ghost install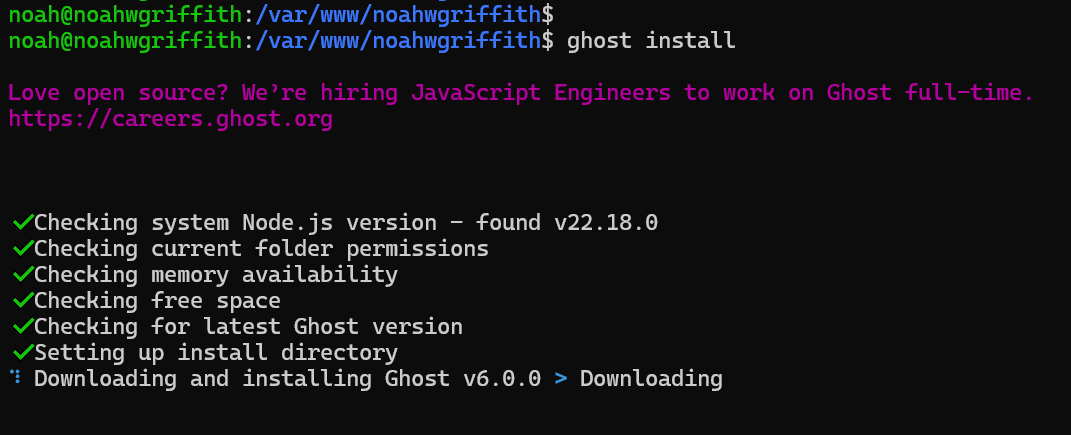
This can take a while so just be patient. Once the setup got going, this was my configuration:
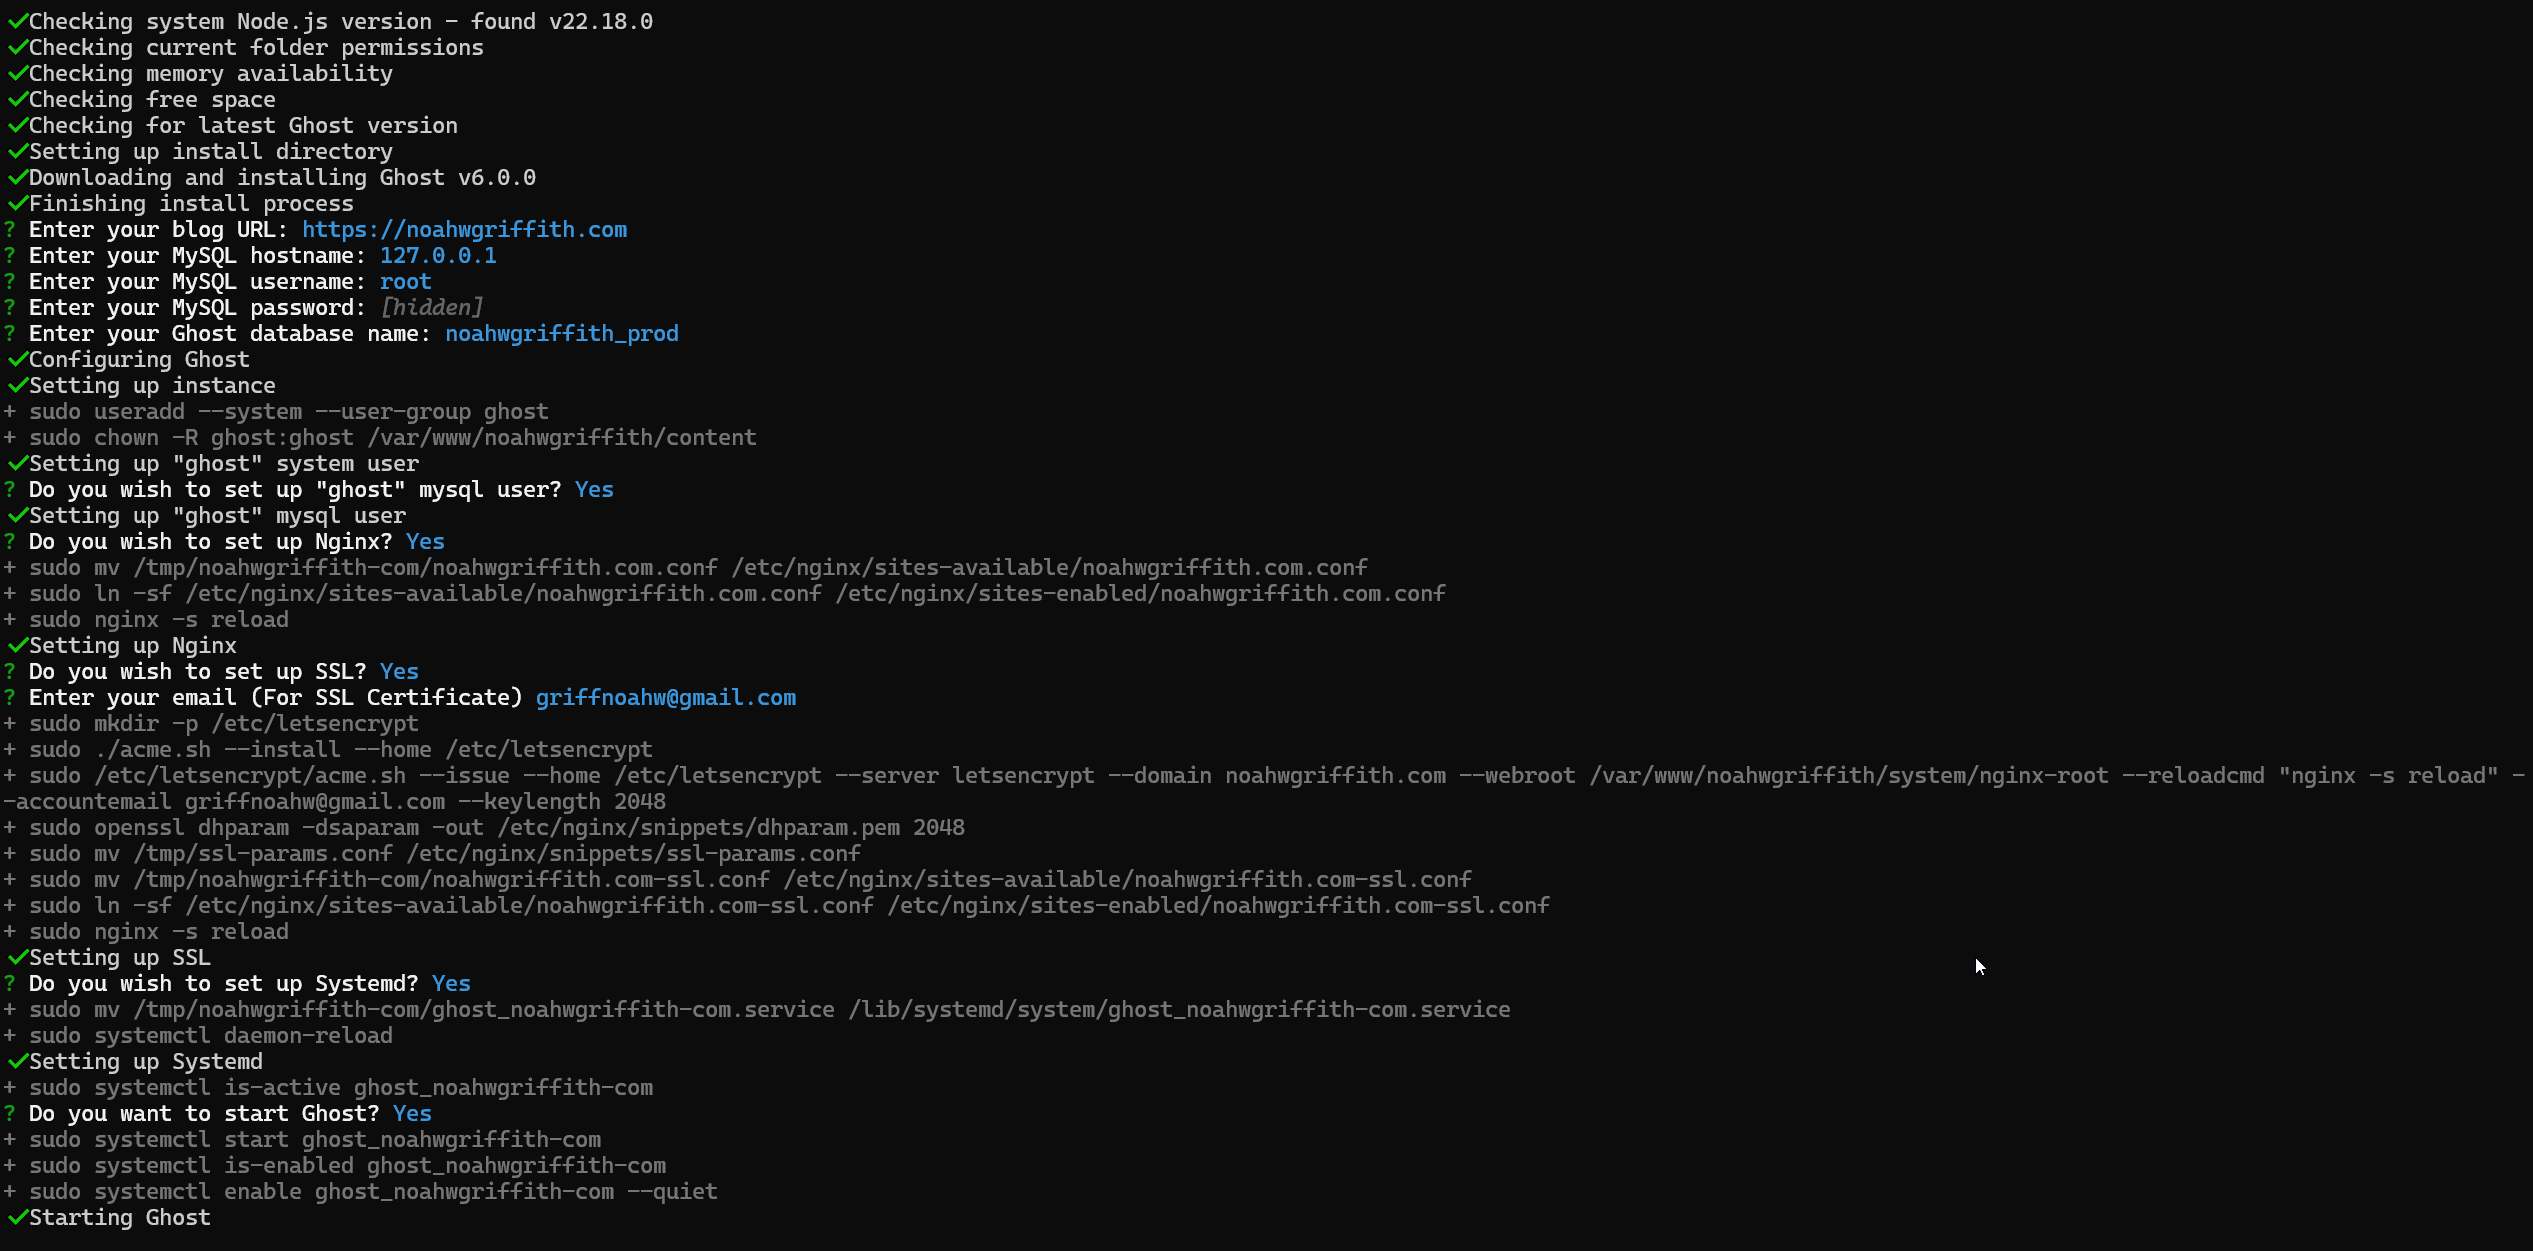
Summary
Overall, Ghost is relatively straightforward to set up. The main challenge was configuring MySQL and ensuring the correct NodeJS version was installed. Once these issues were resolved, the rest of the deployment proceeded smoothly.
At this point, Ghost will provide a link to the admin dashboard, where you can manage content and customize themes.
I currently have mailing lists and subscriptions set up, but this process is extensive enough to warrant its own documentation and post.
Thanks for reading. I hope this documentation proves useful to anyone exploring VPS technology or looking to deploy Ghost.
Member discussion